Features
- Http1/H2/H2cUpgrade
- Https
- Epoll/NIO
- Serialize and Deserialize
- Interceptor
- Filter
- Retry, Redirect, 100-expect-continue
- Segmented read/write
- Multipart
- Metrics
- more features…
This is the multi-page printable view of this section. Click here to print.
RestClient!<dependency>
<groupId>io.esastack</groupId>
<artifactId>restclient</artifactId>
<version>${esa-restclient.version}</version>
</dependency>
final RestClient client = RestClient.ofDefault();

final String entity = client.post("http://127.0.0.1:8081/")
        .entity("Hello Server")
        .execute()
        .toCompletableFuture()
        .get()
        .bodyToEntity(String.class);
netty 4.1.52.Final and tcnative 2.0.34.Final are directly dependent on. And please make sure the version of tcnative matches the version of netty.
RestClient会自动根据用户的 Headers 与 Entity 自动选择合适的Decoder或Encoder进行Decode或Encode。同时RestClient也支持用户在codec前后进行插入业务逻辑。RestClient会自动根据用户的 Headers 与 Entity 等选择合适的Encoder进行Encode。其内置了下面这些Encoder:
Json
jackson :默认,自动通过SPI的方式注入到RestClient中
fastjson :需要引入fastjson依赖,并将FastJsonCodec添加到RestClient中
gson :需要引入gson依赖,并将GsonCodec添加到RestClient中
ProtoBuf :需要引入ProtoBuf依赖,并将ProtoBufCodec添加到RestClient中
File :自动通过SPI的方式注入到RestClient中
String :自动通过SPI的方式注入到RestClient中
byte[] :自动通过SPI的方式注入到RestClient中
除此之外RestClient也支持用户自定义Encoder。
指定contentType为MediaType.APPLICATION_JSON,将自动使用Json Encoder来对Entity来进行Encode。示例如下:
final RestClient client = RestClient.ofDefault();
RestResponseBase response  = client.post("localhost:8080/aaa")
        .contentType(MediaType.APPLICATION_JSON)
        .entity(new Person("Bob","male"))
        .execute()
        .toCompletableFuture()
        .get();
yyyy-MM-dd HH:mm:ss
<dependency>
    <groupId>com.google.protobuf</groupId>
    <artifactId>protobuf-java</artifactId>
</dependency>
将ProtoBufCodec加入到RestClient中,指定contentType为ProtoBufCodec.PROTO_BUF,且Entity类型为com.google.protobuf.Message的子类时,将自动使用ProtoBuf Encoder来对Entity来进行Encode。示例如下:
//将ProtoBufCodec加入到RestClient中
final RestClient client = RestClient.create()
        .addEncoder(new ProtoBufCodec())
        .build();

RestResponseBase response  = client.post("localhost:8080/aaa")
        .contentType(ProtoBufCodec.PROTO_BUF)
        .entity(message)
        .execute()
        .toCompletableFuture()
        .get();
当Entity类型为File时,将自动使用File Encoder来对Entity来进行Encode。示例如下:
final RestClient client = RestClient.ofDefault();
RestResponseBase response  = client.post("localhost:8080/aaa")
        .entity(new File("tem"))
        .execute()
        .toCompletableFuture()
        .get();
当Entity类型为String时,将自动使用String Encoder来对Entity来进行Encode。示例如下:
final RestClient client = RestClient.ofDefault();
RestResponseBase response  = client.post("localhost:8080/aaa")
        .entity("string")
        .execute()
        .toCompletableFuture()
        .get();
当Entity类型为byte[]时,将自动使用byte[] Encoder来对Entity来进行Encode。示例如下:
final RestClient client = RestClient.ofDefault();
RestResponseBase response = client.post("localhost:8080/aaa")
        .entity("bytes".getBytes())
        .execute()
        .toCompletableFuture()
        .get();
当RestClient内置的Encoder无法满足用户需求时,用户可以自定义Encoder,示例如下:
public class StringEncoder implements ByteEncoder {

    @Override
    public RequestContent<byte[]> doEncode(EncodeContext<byte[]> ctx) {
        if (MediaType.TEXT_PLAIN.isCompatibleWith(ctx.contentType())) {
            if (ctx.entity() != null) {
                return RequestContent.of(ctx.entity().toString());
            } else {
                return RequestContent.of("null");
            }
        }
        //该Encoder无法Encode这种类型,将Encode工作交给下一个Encoder
        return ctx.next();
    }
}
在RestClient中,同时存在多个Encoder,它们之间通过getOrder()方法返回值区分执行顺序,值越小,优先级越高。
针对当前Encoder,分为两种情况:
Encoder可以Encode该请求:
直接返回Encode后的结果。Encoder不可以Encode该请求:
调用ctx.next(),将Encode工作交给下一个Encoder,如果RestClient中的所有Encoder都无法编码该请求,则RestClient将抛出CodecException异常。在构造RestClient时传入自定义的Encoder实例,如:
final RestClient client = RestClient.create()
        .addEncoder(ctx -> {
            //encode...
            return ctx.next();
        })
        .build();
RestClient支持通过SPI的方式加载Encoder接口的实现类,使用时只需要按照SPI的加载规则将自定义的Encoder放入指定的目录下即可。
如果用户自定义的Encoder对于不同RestClient的配置有不同的实现,则用户可以实现EncoderFactory接口,并按照SPI的加载规则将自定义的EncoderFactory放入指定的目录下即可。
public interface EncoderFactory {
    Collection<Encoder> encoders(RestClientOptions clientOptions);
}
在RestClient构建时将调用EncoderFactory.encoders(RestClientOptions clientOptions),该方法返回的所有Encoder都将加入到构建好的RestClient中。
Encoder可以直接绑定Request,使用方式如下:
final RestResponseBase response = client.post(url)
        .entity(new File("aaa"))
        .encoder(ctx -> {
            //encode...
            return ctx.next();
        })
        .execute()
        .toCompletableFuture()
        .get();
Request绑定了Encoder,该Client中设置的所有Encoder将对该请求失效。即:如果当前Encoder无法Encode该请求的Entity,则RestClient将会抛出CodecException异常。
见请求处理完整流程中的Encoder。
用户可以通过EncodeAdvice在Encode前后插入业务逻辑,来对要Encode的 Entity 或者 Encode后的RequestContent 进行修改替换等操作。
public class EncodeAdviceImpl implements EncodeAdvice {
    @Override
    public RequestContent<?> aroundEncode(EncodeAdviceContext ctx) throws Exception {
        //...before encode
        RequestContent<?> requestContent = ctx.next();
        //...after encode
        return requestContent;
    }
}
getOrder()方法返回值区分执行顺序,值越小,优先级越高。
在构造RestClient时传入自定义的EncodeAdvice实例,如:
final RestClient client = RestClient.create()
        .addEncodeAdvice(ctx -> {
            //...before encode
            RequestContent<?> requestContent = ctx.next();
            //...after encode
            return requestContent;
        })
        .build();
RestClient支持通过SPI的方式加载EncodeAdvice接口的实现类,使用时只需要按照SPI的加载规则将自定义的EncodeAdvice放入指定的目录下即可。
如果用户自定义的EncodeAdvice对于不同RestClient的配置有不同的实现,则用户可以实现EncodeAdviceFactory接口,并按照SPI的加载规则将自定义的EncodeAdviceFactory放入指定的目录下即可。
public interface EncodeAdviceFactory {
    Collection<EncodeAdvice> encodeAdvices(RestClientOptions clientOptions);
}
在RestClient构建时将调用EncodeAdviceFactory.encodeAdvices(RestClientOptions clientOptions),该方法返回的所有EncodeAdvice都将加入到构建好的RestClient中。
见请求处理完整流程中的EncodeAdvice。
RestClient会自动根据用户的 Headers 与 期望Entity类型 等选择合适的Decoder进行解码。RestClient内置了下面这些Decoder:
Json
jackson :默认,自动通过SPI的方式注入到RestClient中
fastjson :需要引入fastjson依赖,并将FastJsonCodec添加到RestClient中
gson :需要引入gson依赖,并将GsonCodec添加到RestClient中
ProtoBuf :需要引入ProtoBuf依赖,并将ProtoBufCodec添加到RestClient中
String :自动通过SPI的方式注入到RestClient中
byte[] :自动通过SPI的方式注入到RestClient中
除此之外RestClient也支持用户自定义解码器。
当Response的contentType为MediaType.APPLICATION_JSON,将自动使用Json Decoder来来进行Decode。
final RestClient client = RestClient.ofDefault();
RestResponseBase response  = client.get("localhost:8080/aaa")
        .execute()
        .toCompletableFuture()
        .get();

//当 response.contentType() == MediaType.APPLICATION_JSON 时将自动使用Json Decoder
Person person = response.bodyToEntity(Person.class);
yyyy-MM-dd HH:mm:ss
<dependency>
    <groupId>com.google.protobuf</groupId>
    <artifactId>protobuf-java</artifactId>
</dependency>
将ProtoBufCodec加入到RestClient中, 当Response的contentType为ProtoBufCodec.PROTO_BUF,且response.bodyToEntity()传入的类型为com.google.protobuf.Message的子类时,将自动使用ProtoBuf Decoder来进行Decode。
//将ProtoBufCodec加入到RestClient中
final RestClient client = RestClient.create()
        .addDecoder(new ProtoBufCodec())
        .build();

RestResponseBase response = client.get("localhost:8080/aaa")
        .execute()
        .toCompletableFuture()
        .get();

//当 ProtoBufCodec.PROTO_BUF.isCompatibleWith(response.contentType()),且 Person 为 Message 的子类时,将自动使用ProtoBuf Decoder
Person person = response.bodyToEntity(Person.class);
当response.bodyToEntity()传入的类型为String.class,且Response的contentType不为MediaType.APPLICATION_JSON时,将自动使用String Decoder来进行Decode。
final RestClient client = RestClient.ofDefault();
RestResponseBase response = client.get("localhost:8080/aaa")
        .execute()
        .toCompletableFuture()
        .get();

//当 !MediaType.APPLICATION_JSON.isCompatibleWith(response.contentType()) 时,自动使用String Decoder来进行Decode
String result = response.bodyToEntity(String.class);
当response.bodyToEntity()传入的类型为byte[].class,且Response的contentType不为MediaType.APPLICATION_JSON时,将自动使用byte[] Decoder来进行Decode。
final RestClient client = RestClient.ofDefault();
RestResponseBase response = client.get("localhost:8080/aaa")
        .execute()
        .toCompletableFuture()
        .get();

//当 !MediaType.APPLICATION_JSON.isCompatibleWith(response.contentType()) 时,自动使用byte[] Decoder来进行Decode
byte[] result = response.bodyToEntity(byte[].class);
当RestClient内置的Decoder无法满足用户需求时,用户可以自定义Decoder,示例如下:
public class StringDecoder implements ByteDecoder {

    @Override
    public Object doDecode(DecodeContext<byte[]> ctx) {
        if (String.class.isAssignableFrom(ctx.targetType())) {
            return new String(ctx.content().value());
        }
        return ctx.next();
    }
}
在RestClient中,同时存在多个Decoder,它们之间通过getOrder()方法返回值区分执行顺序,值越小,优先级越高。
针对当前Decoder,分为两种情况:
Decoder可以Decode该响应:
直接返回Decode后的结果。Decoder不可以Decode该响应:
调用ctx.next(),将Decode工作交给下一个Decoder,如果RestClient中的所有Decoder都无法编码该请求,则RestClient将抛出CodecException异常。在构造RestClient时传入自定义的Decoder实例,如:
final RestClient client = RestClient.create()
        .addDecoder(ctx -> {
            //decode...
            return ctx.next();
        })
        .build();
RestClient支持通过SPI的方式加载Decoder接口的实现类,使用时只需要按照SPI的加载规则将自定义的Decoder放入指定的目录下即可。
如果用户自定义的Decoder对于不同RestClient的配置有不同的实现,则用户可以实现DecoderFactory接口,并按照SPI的加载规则将自定义的DecoderFactory放入指定的目录下即可。
public interface DecoderFactory {
    Collection<Decoder> decoders(RestClientOptions clientOptions);
}
在RestClient构建时将调用DecoderFactory.decoders(RestClientOptions clientOptions),该方法返回的所有Decoder都将加入到构建好的RestClient中。
Decoder可以直接绑定Request,使用方式如下:
final RestResponseBase response = client.post(url)
        .entity(new File("aaa"))
        .decoder(ctx -> {
            //decode...
            return ctx.next();
        })
        .execute()
        .toCompletableFuture()
        .get();
Request绑定了Decoder,该Client中设置的所有Decoder将对该请求失效。即:如果当前Decoder无法解码该响应,则RestClient将会抛出CodecException异常。
见请求处理完整流程中的Decoder。
用户可以通过DecodeAdvice在Decode前后进行来插入业务逻辑,来对要解码的 ResponseContent 或者 Decode后的对象 进行修改替换等操作。
public class DecodeAdviceImpl implements DecodeAdvice {
    @Override
    public Object aroundDecode(DecodeAdviceContext ctx) throws Exception {
        //...before decode
        Object decoded = ctx.next();
        //...after decode
        return decoded;
    }
}
DecodeAdvice之间通过getOrder()方法返回值区分执行顺序,值越小,优先级越高。
在构造RestClient时传入自定义的DecodeAdvice实例,如:
final RestClient client = RestClient.create()
        .addDecodeAdvice(ctx ->{
            //...before decode
            Object decoded = ctx.next();
            //...after decode
            return decoded;
        })
        .build();
RestClient支持通过SPI的方式加载DecodeAdvice接口的实现类,使用时只需要按照SPI的加载规则将自定义的DecodeAdvice放入指定的目录下即可。
如果用户自定义的DecodeAdvice对于不同RestClient的配置有不同的实现,则用户可以实现DecodeAdviceFactory接口,并按照SPI的加载规则将自定义的DecodeAdviceFactory放入指定的目录下即可。
public interface DecodeAdviceFactory {
    Collection<DecodeAdvice> decodeAdvices(RestClientOptions clientOptions);
}
在RestClient构建时将调用DecodeAdviceFactory.decodeAdvices(RestClientOptions clientOptions),该方法返回的所有DecodeAdvice都将加入到构建好的RestClient中。
见请求处理完整流程中的DecodeAdvice。
RestClient支持通过builder配置和SPI加载两种方式配置RestInterceptor。在构造RestClient时传入自定义的RestInterceptor实例,如:
final RestClient client = RestClient.create()
        .addInterceptor((request, next) -> {
            System.out.println("Interceptor");
            return next.proceed(request);
        }).build();
getOrder()方法返回值区分执行顺序,值越小,优先级越高。
RestClient支持通过Spi的方式加载RestInterceptor接口的实现类,使用时只需要按照SPI的加载规则将自定义的RestInterceptor放入指定的目录下即可。
如果用户自定义的RestInterceptor对于不同RestClient的配置有不同的实现,则用户可以实现RestInterceptorFactory接口,并按照SPI的加载规则将自定义的RestInterceptorFactory放入指定的目录下即可。
public interface RestInterceptorFactory {
    Collection<RestInterceptor> interceptors(RestClientOptions clientOptions);
}
在RestClient构建时将调用RestInterceptorFactory.interceptors(RestClientOptions clientOptions),该方法返回的所有RestInterceptor都将加入到构建好的RestClient中。
见请求处理完整流程中的RestInterceptor。
RestClient通过适配netty原生的AddressResolverGroup提供了一种更加简单、 灵活的NameResolver扩展,用于将url地址中的域名解析成IP地址。final RestClient client = RestClient.create().resolver(new HostResolver() {
@Override
public CompletionStage<InetAddress> resolve(String inetHost) {
// resolve inetHost
return CompletableFuture.completedFuture(null);
}
}).build();
在构造RestClient时传入自定义的HostResolver,后续建立连接时会调用resolve()方法进行Host地址解析。默认情况下,将使用系统默认的命名服务进行Host解析,详情请查看SystemDefaultResolver。
RestClient支持大文件上传功能。需要说明地是,对于内容较小的文件,可通过直接将文件内容写入请求body。 本文只讨论当文件内容过大,直接写入有OOM风险时的大文件上传功能。final RestClient client = RestClient.ofDefault();
final String entity = client.post("http://127.0.0.1:8081/")
.entity(new File("aaa"))
.execute()
.toCompletableFuture()
.get()
.bodyToEntity(String.class);
如上所示,RestClient将分块读取文件内容并将其写入请求body中,对应请求的Content-Type为application/octet-stream。该情形适用于单个大文件内容作为原始body内容上传的情况。
final RestClient client = RestClient.ofDefault();

File file = new File("xxxxx");
final RestMultipartRequest request = client.post("http://127.0.0.1:9997/file/upload")
        .multipart()
        .file("file", file)
        .attr("name", "Bob")
        .attr("address", "China");

RestResponseBase response = request
        .execute()
        .toCompletableFuture()
        .get();
System.out.println(response.status());
System.out.println(response.bodyToEntity(String.class));
如上所示,RestClient将添加的文件和表单参数进行Multipart Encode的结果作为请求的body内容,对应的Content-Type为multipart/form-data。 该情形适用于需要进行multipart encode或者存在表单参数的情形。特别地,如果只上传表单参数,不存在文件时,则可以直接将Content-Type设置为application/x-www-form-urlencoded。
RestClient会自动使用连接池来管理与服务端的长连接。默认情况下,单个域名的连接池配置如下:
| Parameter | Description | Default |
|---|---|---|
| connectionPoolSize | 连接池最大值 | 512 |
| connectionPoolWaitingQueueLength | 等待获取连接队列大小 | 256 |
| connectTimeout | 连接超时时间 | 3000(ms) |
| readTimeout | 读超时时间 | 6000(ms) |
在buildRestClient实例时,可以直接设置全局连接池参数,通过该方式设置的参数对构造出的client实例全局生效。具体使用方式如下:
final RestClient client = RestClient.create()
        .connectionPoolSize(512)
        .connectionPoolWaitingQueueLength(256)
        .readTimeout(6000L)
        .connectTimeout(3000)
        .build();
RestClient支持对不同域名设置不同的连接池参数,如果需要使用该功能,只需要在构造RestClient实例时传入ChannelPoolOptionsProvider即可。示例如下:
final RestClient client = RestClient.create().channelPoolOptionsProvider(new ChannelPoolOptionsProvider() {
    @Override
    public ChannelPoolOptions get(SocketAddress key) {
        // customize options
	return null;
    }
}).build();
如上所示,RestClient将请求url中的地址解析成SocketAddress,然后以该地址为key获取对应的连接池参数,如果结果不为null则以获取到的
值为准,否则将使用连接池全局配置。
连接的保持同样需要消耗一定的系统资源,因此及时关闭一些不再需要的连接池是必要的。RestClient默认连接池缓存参数如下:
| Parameter | Description | Default |
|---|---|---|
| initialCapacity | 缓存池初始化大小 | 16 |
| maximumSize | 缓存池最大值 | 512 |
| expireSeconds | 访问过期时间 | 600(s) |
如上参数表示:连接池初始容量为16,最大容量为512,当连续10min连接池未被使用时该连接池将被关闭。使用时,可以通过系统属性更新上述参数,具体为:
RestClient支持用户配置请求级别读超时、请求重试、请求重定向、100-expect-continue 等功能。RestClient的读超时功能通过底层的HttpClient来实现,可以分别支持 Client 级别 及 Request 级别。默认读超时为6000L。Client级别的读超时将对该Client下的所有请求生效,具体配置方式如下:
final RestClient client = RestClient.create()
        .readTimeout(3000L)
        .build();
当Request设置了读超时,其数据将覆盖Client设置的读超时,具体配置方式如下:
final RestClient client = RestClient.ofDefault();

final String entity = client.get("http://127.0.0.1:8081/")
        .readTimeout(3000L)
        .execute()
        .toCompletableFuture()
        .get()
        .bodyToEntity(String.class);
RestClient的重试功能通过底层的HttpClient来实现,可以分别支持 Client 级别 及 Request 级别。默认最大重试次数为3。Client级别的重试将对该Client下的所有 Request 生效,使用时,可以通过自定义RetryOptions参数更改重试次数、重试条件、重试间隔时间等。具体配置方式如下:
final RestClient client = RestClient.create()
        .retryOptions(RetryOptions.options()
                .maxRetries(3)
                .intervalMs(value -> value)
                .predicate((request, response, ctx, cause) -> cause != null)
                .build())
        .connectionPoolSize(2048)
        .build();
当Request设置了重试次数,其数据将覆盖Client设置的重试次数,具体配置方式如下:
final RestClient client = RestClient.ofDefault();

final String entity = client.get("http://127.0.0.1:8081/")
        .maxRetries(3)
        .execute()
        .toCompletableFuture()
        .get()
        .bodyToEntity(String.class);
RestClient的重定向功能通过底层的HttpClient来实现,可以分别支持 Client 级别 及 Request 级别。默认最大重定向次数为5。Client级别的重定向将对该Client下的所有 Request 生效,具体配置方式如下:
final RestClient client = RestClient.create()
        .maxRedirects(3)
        .build();
当Request设置了重定向次数,其数据将覆盖Client设置的重定向次数,具体配置方式如下:
final RestClient client = RestClient.ofDefault();

final String entity = client.get("http://127.0.0.1:8081/")
        .maxRedirects(3)
        .execute()
        .toCompletableFuture()
        .get()
        .bodyToEntity(String.class);
RestClient的100-expect-continue功能通过底层的HttpClient来实现,可以分别支持 Client 级别 及 Request 级别。默认100-expect-continue为false。100-expect-continueClient级别的100-expect-continue将对该Client下的所有 Request 生效,具体配置方式如下:
final RestClient client = RestClient.create()
        .useExpectContinue(true)
        .build();
100-expect-continue当Request设置了100-expect-continue,其数据将覆盖Client设置的100-expect-continue,具体配置方式如下:
final String entity = client.get("http://127.0.0.1:8081/")
        .disableExpectContinue()
        .execute()
        .toCompletableFuture()
        .get()
        .bodyToEntity(String.class);
RestClient提供了IO线程池及连接池的Metric指标统计,使用时通过RestClient实例便可直接获取。final RestClient client = RestClient.ofDefault();
ConnectionPoolMetricProvider connectionPoolMetricProvider = client.connectionPoolMetric();
ConnectionPoolMetric connectionPoolMetric = connectionPoolMetricProvider.get(InetSocketAddress.createUnresolved("127.0.0.1", 8080));
// 连接池配置
connectionPoolMetric.options();
// 等待获取连接的请求个数
connectionPoolMetric.pendingAcquireCount();
// 活跃连接个数
connectionPoolMetric.active();
// 等待获取连接队列最大值
connectionPoolMetric.maxPendingAcquires();
// 连接池最大值
connectionPoolMetric.maxSize();
IoThreadGroupMetric ioThreadGroupMetric = client.ioThreadsMetric();
for (IoThreadMetric ioThreadMetric : ioThreadGroupMetric.childExecutors()) {
// 任务队列大小
ioThreadMetric.pendingTasks();
// 任务队列最大值
ioThreadMetric.maxPendingTasks();
// 线程状态
ioThreadMetric.state();
// 线程名称
ioThreadMetric.name();
}
RestClient中的每个请求都拥有相同的生命周期,了解请求的生命周期便于用户更好地使用RestClient。
RestClient支持用户通过配置文件的方式对请求再次进行分流。<dependency>
<groupId>io.esastack</groupId>
<artifactId>traffic-split-file-config</artifactId>
<version>${esa-restclient.version}</version>
</dependency>
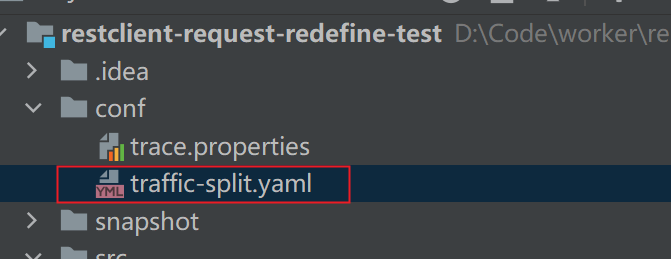
如下图所示,在项目根路径的conf目录下新建名为traffic-split.yaml的配置文件:
# 可以不配置,默认为false,为true时,自动关闭分流功能
close: 'false'
# 规则,数据结构为数组,用户可同时配置多条,当请求命中一条时,后续的规则将不再匹配
rules:
  # 规则名称
  - name: "aaa"
    # 多条conditions的match模式,all指所有condition匹配时才算匹配
    match: 'all'
    # 规则的匹配条件,数据结构为数组,用户可设置多个condition
    conditions:
      # 第一条 condition
      - method: 'post'
        uriAuthority:
          exact: "localhost:8080"
        header:
          - name: 'name1'
            value:
              exact: 'value1'
      # 第二条 condition
      - params:
          - name: 'name3'
            value:
              exact: 'value3'
    # 当 conditions 匹配上时,要执行的动作
    action:
      rewrite:
        uriAuthority: "localhost:8080"
        path: "/request/redefineSuccess"
      headers:
        add:
          a: "xxx"
          b: "aaa"
| 配置项 | 数据结构 | 配置内容 |
|---|---|---|
| name | String | 规则名称 |
| match | String | all : 所有condition匹配时才算匹配 any : 任意一个condition匹配时就算匹配 not : 所有condition都要不匹配时才算匹配 |
| conditions | List<Condition> | 规则的匹配条件,用户可设置多个condition |
| action | List<Action> | 当 conditions 匹配时,要执行的动作 |
| 配置项 | 数据结构 | 配置内容 |
|---|---|---|
| method | String | 要匹配的方法: Get、Post 等等,不区分大小写 |
| uriAuthority | String | 要匹配的 uriAuthority |
| path | String | 要匹配的 path |
| headers | Map<String , StringMatcher> | 要匹配的 header,key为header的name,value为StringMatcher(见下文介绍),StringMatcher为空时,则代表匹配任意value |
| params | Map<String , StringMatcher> | 要匹配的 param,key为header的name,value为StringMatcher(见下文介绍),StringMatcher为空时,则代表匹配任意value |
StringMatcher| 配置项 | 数据结构 | 配置内容 |
|---|---|---|
| exact | String | 精确匹配的内容 |
| prefix | String | 前缀匹配的内容 |
| regex | String | 正则匹配的内容 |
| 配置项 | 配置说明 |
|---|---|
| rewrite | 重写请求的 uriAuthority 或者 path (具体配置见下文) |
| headers | 操作请求的 headers(具体配置见下文) |
| params | 操作请求的 params(具体配置见下文) |
rewrite| 配置项 | 数据结构 | 配置内容 |
|---|---|---|
| uriAuthority | String | 重写后的uriAuthority |
| path | String | 重写后的path |
headers| 配置项 | 数据结构 | 配置内容 |
|---|---|---|
| set | Map<String , String> | 要设置 headers |
| add | Map<String , String> | 要新增 headers |
| remove | List<String > | 要删除的 headers |
params| 配置项 | 数据结构 | 配置内容 |
|---|---|---|
| set | Map<String , String> | 要设置 params |
| add | Map<String , String> | 要新增 params |
| remove | List<String > | 要删除的 params |